


Bug out bags have evolved a lot over the years, especially as survival experts have made their way online to collaborate and share their own tips and tricks. This post contains several reminders when you are considering how to organize your bug out bag.
Preppers and manufacturers have engineered ways to make them cheaper, lighter, smaller and so on in an attempt to reduce their payload and maximize chances of survival in a disaster situation.
In fact, it has also become a sort of hobby for many enthusiasts and serious preppers alike to work on their bug out bag and find new ways to make it better.
It’s no secret, especially if you’ve read our other articles that it is extremely easy to overload your bug out bag.
Even when trying to make it lighter and smaller, unless you’re very careful or experienced, the end result is a bag that’s filled to the brim with “stuff.”
Packing, repacking, adding and removing items from your bug out survival bag is something we teach as a part of your regular emergency preparedness routine so, in this article, we’re going to focus on another aspect: how to organize it.
This can make your bag a little heavier and bulkier, but you’ll also get some benefits that will… *ahem* outweigh the cons, such as:
- The items will be well-organized – meaning you will get to them faster (instead of having to spend precious minutes searching through them to get the one you need)
- You can arrange the containers so they don’t put that much strain on your back (we’ll tell you how in a minute)
- You can easily take the containers out of the bag and throw them into your car’s bug out bag or attach them to the bug out bags of family (let’s say you really need the backpack for something else for a while or that yours is pretty heavy and the others in the group can chip in and help you carry some of the load)
So with that said, let’s explore how we go about doing this in detail…

Which Containers to Use?
Before we talk about how to actually organize your BOB, we need to discuss the containers you’re going to use. The ideal container is something:
- Lightweight
- Waterproof
- Puncture Proof
- Transparent
Of course, most items don’t meet all these requirements, but you can arrange them in your bug out bag strategically to make sure the items inside are protected.
So what containers do we recommend?
Let’s talk about some of the best containers you can use to store your gear.
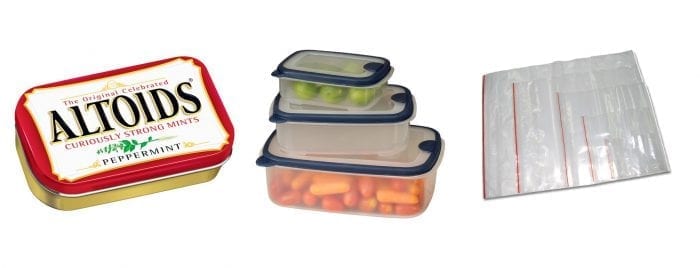
The most important ones are, of course, zipper bags, like Zip-Loc resealable kitchen bags. These are great because they come in multiple sizes and they’re waterproof. We suggest packing most of your stuff in them, including lighters, electronics, multi-tools, tinder, matches, medical supplies and anything else you can’t afford to get wet.
The downside is that they’re vulnerable to punctures. But they’re really lightweight, compact and inexpensive so you can easily store more than enough in your bug out bag in case you need extras. And they’re transparent, meaning you don’t have to label them or open them to see what’s inside, although labeling can’t hurt either!
Should you really put everything inside zipper bags?
If possible, yes. Some of the other containers we’re going to talk about aren’t waterproof or they may leak and, besides, you can’t have too many plastic zipper bags as they have a million and one uses in a pinch or emergency survival situation.
Food Containers
You probably already have them. They’re made of plastic, they’re transparent and some of them are waterproof. You may not always be able to find the right size that’s waterproof but that’s okay.
When it comes to containers, it can take some practice to know your inventory enough to sufficiently package them without wasting space or it being difficult to locate what you’re looking for. If this gets to be too much of a challenge, then just store your items inside clear zipper bags and your gear will be protected. As with many things related to survival, it comes down to personal preference.
Altoid Tins
Though they’re not waterproof, they’re very light as well as small. Use them to keep things such as fishing hooks, needles, sewing kits etc. Again, we recommend you put the items inside zipper bags to protect them from the elements.
Altoid tins (as should anything in your bug out bag) have multiple uses in a survival scenario, including: parts used for a miniature cooking stove, an emergency signal mirror, a solar emergency radio and so on.
As always, the more alternative uses for the survival items in your backpack, the better.
Pelican Cases
If you’re willing to spend a few extra bucks, there’s no better choice you can make than a waterproof, shock-absorbing Pelican micro case. Some of the more popular models used for survival essentials are Pelican 1010, Pelican 1040, and Pelican 1060. You can find all of them on Amazon for less than 20 bucks each.
Price is the main drawback here. If you get 5 or 6 of them, this can quickly add up. If budget is a primary concern, sticking with the other more economical types of containers above will serve you just fine.
What about the actual backpack?
We cover this elsewhere on the site, but suffice to say that the size of your bug out bag depends on a number of factors, such as the distance between you and your bug out location, your fitness level, and on whether or not you have a bug out vehicle.
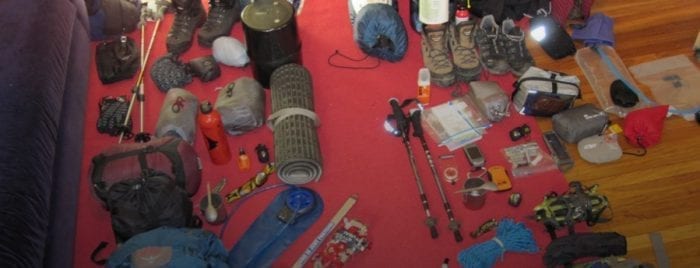
How to Organize Your Bug Out Bag
Ok, now that we know what to store our bug out bag essentials in, how do we actually pack them?
There are two ways to go about it…
One popular way is to think in terms of “function.”
For example, you will need a fire starting kit, a first aid kit and a sewing kit. This way you won’t have to go through your entire bag to find your tinder, then your fire starting devices and so on.
The other way to look at it is in terms of things that can go wrong. So, if, for instance, you’re separated from your fire starting kit (maybe you loan it to someone, maybe it gets lost, stolen or left behind)… then you’re obviously left without a way to start a fire if that kit contained all fire starting devices.
Making fire kits and first aid kits is relatively easy, so let’s take a closer look at the second approach.
What would you say to the idea of having mini-survival kits inside your bug out bag?
If you’re forced to bug out on foot and you can’t carry the weight anymore (due to fatigue, injury, blisters etc.), having smaller kits within a larger one is an effective strategy when the going gets tough.
Imagine the worst-case scenario of you getting lost in the woods with nothing more than one of those pouches.
What would you need in order to survive?
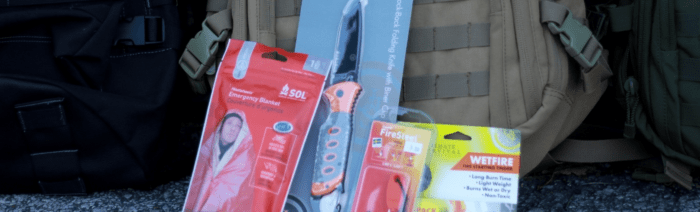
Water, food, shelter, protection and a way to light your way are all musts. So each of these containers might include a space blanket, a way to start a fire (bic lighters, magnesium fire starters), a few water purification tablets and a flashlight.
Pretty simple, right?
Truth be told, there’s no right way of doing this. If you want, you can have two such kits with two LifeStraws or Sawyer Minis in each (though you have to keep in mind the final weight of the bag by adding too much or too many similar items).
Now that you have one or even two mini survival kits inside your BOB, you can think about organizing the rest in terms of function.
For example, your electronics kit may contain spare batteries for all your devices, a small emergency radio, flashlights and so on. (This is a little bit more advanced, but if you want to take it one step further, you can wrap the zipper bags of items in aluminum foil, which will hopefully protect them from an EMP, or electromagnetic pulse attack.)
Okay so next on the list, your main fire starting kit should have everything pertaining to… starting a fire, such as:
- Blast-matches
- A magnesium fire starter
- Steel wool and a 9V battery.
- Lighters, etc.
It’s up to you if you want to keep the battery inside your fire starting kit or your electronics kit. Just make sure you keep it separated from the steel wool!
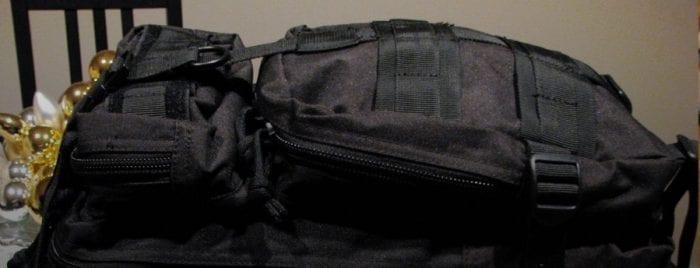
Think Outside the Bug Out Bag
This is something most people forget. Even if you have a large bug out bag, how you put your stuff inside makes a huge difference, but what you put outside the bag is just as important.
First off, you want to keep everything that you may need to access quickly inside outer pockets. The first aid kit may be such an example. You’ll also want to keep your survival knife handy as well as a flashlight or headlamp.
We recommend keeping these items easily accessible on the outside of your bug out bag using the loops and straps on your bag to firmly secure them. Carabiner clips are also very useful for securing your items to your bag where you can get to them easily and quickly.
Another tip is to think about what items you may need on your person if you were to get separated from your bag.
In our other articles we discuss the importance of “redundancy,” or having more than one item that serves a particular use. It’s always a good idea to have some of these items on you at all times, such as 550 paracord, a reliable flashlight or headlamp, a trusty fire starter, and a dependable survival knife.
How Should You Put the Containers Inside the Bug Out Bag?
Regarding the containers that go inside the bag, the goal is to distribute their weight with your back in mind. If you put them at random, you’ll put more strain on your back which could slow you down and even lead to back pain or injury.
The rule of thumb we practice is to put the heaviest containers closest to your spine so you don’t feel like the entire bag is pulling away from you.
Keeping in mind the items you’ll need to access more than others, you can prioritize where things go much better.
Summary
To recap, there are three main ways to organize your bug out bag:
- Make small, modular survival kits that go inside
- Organize by the “function” that the items inside serve such as fishing kits, fire starting kits and so on.
- Think outside the bag
- A combination of all three
Like we say, there is no absolute answer for everyone on what you should do, so the best thing you can do right now is experiment and see what works best…
What is right for one person, might not work for another. The important thing is that it works for you and you have access to what you need when it counts the most.
—
The preceding article was a guest post collaboration courtesy of Dan Sullivan. Dan is a seasoned blogger who runs an extensive survival and emergency preparedness site over at www.survivalsullivan.com.
If you enjoyed this article, please let us know in the comments below and please visit Dan’s site to learn more and show your support for his efforts to teach us what he has learned over the years.